If you want to manage Exchange Online via Azure Automation, Managed Identities is what you should use (this statement was last checked in June 2024).
Legacy approach
In the past, RunAs Accounts or Plaintext Credentials (🤢) were also commonly used for this purpose, but this is now considered deprecated. RunAs accounts will be discontinued by fall 2023. And I don’t have to say anything about plaintext passwords, do I? You could still use App Registrations in Entra ID, but if you really just want to automate some Exchange settings via Azure Automation, it’s not really necessary.
Managed Identities + Exchange Online PowerShell
A System Assigned Managed Identity assigns an identity to an Azure Resource. This identity can be assigned rights, e.g. for the administration of Exchange Online or specific Azure Resources. The management of the identity is done automatically, so there is no need to change a password regularly or anything like that. And if the associated resource (in this case the Azure Automation account) is deleted, the System Assigned Managed Identity is automatically deleted as well. The Exchange Online PowerShell module supports Managed Identities for authentication starting with version 3.
That should theoretically also work with a User Assigned Managed Identity. In that case you’ll create the Managed Identity yourself, but you can assign it to multiple Azure resources. Also useful for some scenarios.
Enable Managed Identity
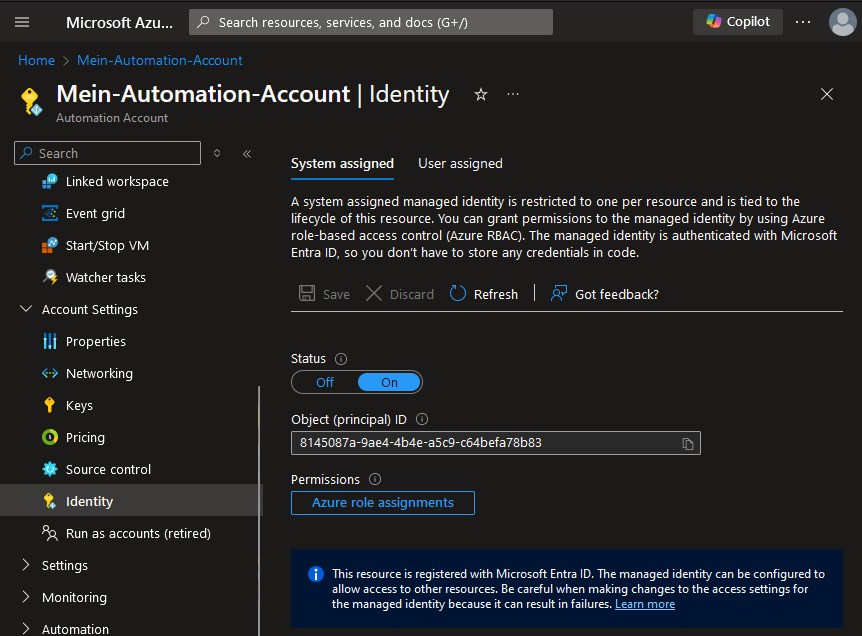
I prefer System Assigned Managed Identities, because then only one resource gets the rights. You can check if the Automation Account has a Managed Identity under “Account settings” -> “Identity”. Here is a example screenshot with an existing Managed Identity: The status is “On” und an Object ID is shown.
The actual assignment of the “Exchange Administrator”-role is done via PowerShell/Graph API.
Configuration via PowerShell
In this section I’ll describe how to configure the permissions using PowerShell. The assignment of the “Exchange Administrator”-role to a Managed Identity needs to be done using a local PowerShell session - the following code shouldn’t be run as an Azure Automation runbook.
Prerequisites:
- The Microsoft.Graph PowerShell module
- A user account with the admin role “Privileged Role Administrator” or “Global Administrator”
If you don’t have the module installed yet, check this article.
| |
Then you can use the following code. The code is commented inline, so I don’t explain it here further.
| |
Add the module
Regardless of whether you are already using “Runtime Environments” or the “Old experience”, you must add the ExchangeOnlineManagement PowerShell module. In the case of the “Old experience” add it to the Automation account. If you are using Runtime Environments, then add the module to a Runtime Environment instead or create a new Runtime Environment. The module is supported by both Windows PowerShell and PowerShell 7.
Use Exchange Online PowerShell
The following example code for a runbook connects to the Exchange Online administration as a System Managed Managed Identity, executes an Exchange Online PowerShell command and then disconnects from Exchange Online again.
| |
Howto Video (German)
I created a German Video showing how Exchange Online can be controlled via Azure Automation. This involves using a System Assigned Managed Identity for the Azure Automation account and assigning Exchange management rights to this identity. You can probably use the automatic translated Subtitles on YouTube, if you don’t speak German.
Further links
The official Microsoft documentation for this can be found here: https://learn.microsoft.com/en-us/powershell/exchange/connect-exo-powershell-managed-identity?view=exchange-ps


